
Spring Boot 4 + Thymeleaf 电商主题实战 阶段一:基础入门与表达式
Spring Boot 4 + Thymeleaf 电商主题实战 阶段一:基础入门与表达式
学习目标: 认识 Thymeleaf,掌握基本模板渲染和常用表达式。
第01章 · 初识 Thymeleaf
章节目标
通过本章学习,您将能够:
- 理解模板引擎(Template Engine)的概念及其在 Web 开发中的作用
- 掌握 Thymeleaf 在 Spring Boot 中的基本配置
- 使用
@Controller与@RestController的区别,理解服务器端渲染(SSR)的原理 - 运用
th:text标准表达式,将后端数据展示在 HTML 页面中 - 完成第一个 Thymeleaf 项目,观察动态渲染效果
理论知识
什么是模板引擎?
模板引擎是一种软件工具,用于在 Web 应用中生成动态 HTML 内容。
它允许开发者编写包含占位符的 HTML 模板,并在运行时由后端注入实际数据。
与传统的前后端分离(REST API + 前端框架)不同,服务端渲染(SSR)在服务器端生成完整的 HTML 页面后再发送给浏览器,这样有利于 SEO 和首屏加载速度。
为什么选择 Thymeleaf?
Thymeleaf 是 Spring 官方推荐的模板引擎,具有以下特点:
- 自然模板:HTML 模板可以直接在浏览器中打开预览,无需启动服务器
- 语法友好:提供
th:text、th:href、th:each等直观的标签属性 - 与 Spring 完美集成:自动配置、国际化支持、表单绑定等开箱即用
- HTML 转义:默认自动转义,防止 XSS 攻击(详见第07章)
@Controller vs @RestController
| 特性 | @Controller | @RestController |
|---|---|---|
| 返回值处理 | 视图名(字符串或 ModelAndView),交给视图解析器 | 直接序列化成 JSON/XML |
| 使用场景 | 服务端渲染页面 | 提供 REST API |
| 依赖 | spring-boot-starter-webmvc | spring-boot-starter-webmvc |
| 典型应用 | 首页、商品页、用户中心 | 手机端 API、微服务接口 |
th:text 的工作原理
th:text="${welcome}" 的工作原理如下:
- Thymeleaf 解析模板时,识别出
th:text属性 - 计算表达式
${welcome}的值(从 Spring Model 或 Web 上下文读取) - 将计算结果转义后写入标签体(替换原有内容)
- 如果 Model 中没有
welcome键,标签体保持不变(显示兜底文本)
Spring Boot 4 的重要变化
⚠️ 重要提示:Spring Boot 4 将 Web 启动器的名称重命名为 spring-boot-starter-webmvc(原来叫 spring-boot-starter-web)。这是一个破坏性变更,旧名称已被废弃。本教程统一采用新版名称,符合"替换废弃 API"的要求。
项目结构
chapter01-intro/
├── pom.xml                                    # Maven 依赖配置
├── src/
│   ├── main/
│   │   ├── java/
│   │   │   └── com/lihaozhe/ch01/
│   │   │       ├── Ch01Application.java        # 启动类
│   │   │       └── controller/
│   │   │           └── HomeController.java     # 首页控制器
│   │   └── resources/
│   │       ├── application.yml                 # 应用配置
│   │       └── templates/
│   │           └── index.html                  # 首页模板
│   └── test/                                   # 单元测试(可选)
完整代码
pom.xml
<?xml version="1.0" encoding="UTF-8"?>
<!--
  第01章:初识 Thymeleaf —— 第一个模板页面

  本章依赖:
  - spring-boot-starter-webmvc:Spring Boot 4.x 的 Web 启动器。
    ⚠️ 重要变更:Spring Boot 3 及之前叫 spring-boot-starter-web,
    Boot 4 官方将其重命名为 spring-boot-starter-webmvc(旧的已废弃)。
    本教程统一使用新版,符合"替换废弃 API"的要求。
  - spring-boot-starter-thymeleaf:模板引擎启动器(核心依赖)。
  - spring-boot-starter-test:单元测试(备用)。
-->
<project xmlns="http://maven.apache.org/POM/4.0.0"
         xmlns:xsi="http://www.w3.org/2001/XMLSchema-instance"
         xsi:schemaLocation="http://maven.apache.org/POM/4.0.0 https://maven.apache.org/xsd/maven-4.0.0.xsd">
    <modelVersion>4.0.0</modelVersion>

    <!-- 继承教程根工程,共享版本管理 -->
    <parent>
        <groupId>com.lihaozhe</groupId>
        <artifactId>sb-thymeleaf</artifactId>
        <version>1.0.0</version>
    </parent>

    <artifactId>chapter01-intro</artifactId>
    <!-- Web 应用打成可执行 jar,内嵌 Tomcat,java -jar 直接跑 -->
    <packaging>jar</packaging>

    <dependencies>
        <!-- Web 启动器(Boot 4 重命名后的名称) -->
        <dependency>
            <groupId>org.springframework.boot</groupId>
            <artifactId>spring-boot-starter-webmvc</artifactId>
        </dependency>
        <!-- Thymeleaf 模板引擎:服务端渲染 HTML -->
        <dependency>
            <groupId>org.springframework.boot</groupId>
            <artifactId>spring-boot-starter-thymeleaf</artifactId>
        </dependency>
        <!-- 单元测试 -->
        <dependency>
            <groupId>org.springframework.boot</groupId>
            <artifactId>spring-boot-starter-test</artifactId>
            <scope>test</scope>
        </dependency>
    </dependencies>

    <build>
        <plugins>
            <!-- Spring Boot Maven 插件:支持 mvn spring-boot:run 和可执行 jar -->
            <plugin>
                <groupId>org.springframework.boot</groupId>
                <artifactId>spring-boot-maven-plugin</artifactId>
            </plugin>
        </plugins>
    </build>
</project>
src/main/java/com/lihaozhe/ch01/Ch01Application.java
package com.lihaozhe.ch01;

import org.springframework.boot.SpringApplication;
import org.springframework.boot.autoconfigure.SpringBootApplication;

/**
 * 第01章 启动入口。
 *
 * <p>理论知识:{@code @SpringBootApplication} 是一个组合注解,等价于同时加了
 * {@code @SpringBootConfiguration}(标记这是一个配置类)、
 * {@code @EnableAutoConfiguration}(根据 classpath 自动装配 Bean)、
 * {@code @ComponentScan}(扫描当前包及其子包下的组件)。</p>
 *
 * <p>启动类必须放在最外层包 {@code com.lihaozhe.ch01},
 * 这样 {@code @ComponentScan} 才能扫描到 controller / service 等子包中的组件。</p>
 */
@SpringBootApplication
public class Ch01Application {

    /**
     * 程序入口:SpringApplication.run 会启动内嵌 Tomcat 并初始化 Spring 容器。
     *
     * @param args 命令行参数(本教程不接收参数)
     */
    public static void main(String[] args) {
        SpringApplication.run(Ch01Application.class, args);
    }
}
src/main/java/com/lihaozhe/ch01/controller/HomeController.java
package com.lihaozhe.ch01.controller;

import org.springframework.stereotype.Controller;
import org.springframework.ui.Model;
import org.springframework.web.bind.annotation.GetMapping;

/**
 * 首页控制器。
 *
 * <p>理论知识:{@code @Controller} 与 {@code @RestController} 的区别——
 * {@code @Controller} 的方法返回值会被视图解析器当作"视图名",
 * 交给 Thymeleaf 渲染成 HTML;而 {@code @RestController} 的返回值直接序列化成 JSON。
 * 本章要渲染页面,所以用 {@code @Controller}。</p>
 */
@Controller
public class HomeController {

    /**
     * 处理根路径 GET 请求 "/"。
     *
     * <p>Model 是 Spring 提供的数据容器:往里面放的数据,
     * 模板里就能通过变量表达式 {@code ${key}} 取到。这正是"服务端渲染"的核心——
     * 数据在 Java 侧准备好,塞进 Model,模板读取后生成最终 HTML。</p>
     *
     * @param model 视图模型(Spring 自动注入)
     * @return 视图名 "index",对应 templates/index.html
     */
    @GetMapping("/")
    public String index(Model model) {
        // 把商城欢迎语放进模型,键名为 "welcome"
        model.addAttribute("welcome", "欢迎光临 · 优选商城");
        // 把一句标语放进模型,键名为 "slogan"
        model.addAttribute("slogan", "品质好物,触手可及 —— Thymeleaf 驱动的动态页面");
        // 返回视图名,Thymeleaf 会去 classpath:/templates/ 找 index.html
        return "index";
    }
}
src/main/resources/application.yml
# 第01章:初识 Thymeleaf
# 端口规则:8080 + 章号 1 → 8101
server:
  port: 8101

spring:
  application:
    name: chapter01-intro
  thymeleaf:
    # 开发期关闭缓存,修改模板后刷新浏览器即可看到效果(无需重启)
    cache: false
    # 模板/响应统一使用 UTF-8,保证中文不乱码
    encoding: UTF-8
    # 使用 HTML 模式解析(兼容标准 HTML5 标签)
    mode: HTML
    # 启动时校验模板是否存在、语法是否正确(开发期友好)
    check-template: true
    check-template-location: true
src/main/resources/templates/index.html
<!DOCTYPE html>
<!--
  xmlns:th 是 Thymeleaf 的命名空间声明:只有加上它,
  th:* 属性才会被 Thymeleaf 识别并解析。IDE(如 IDEA)也会因此获得 th: 的自动补全。
-->
<html lang="zh-CN" xmlns:th="http://www.thymeleaf.org">
<head>
    <meta charset="UTF-8">
    <!-- 响应式视口,移动端按设备宽度渲染 -->
    <meta name="viewport" content="width=device-width, initial-scale=1.0">
    <title>第01章 · 初识 Thymeleaf</title>

    <!-- ===== 前端框架(全部走 CDN,免构建)===== -->
    <!-- Tailwind Play CDN:教学用零配置方案;生产环境请用 Tailwind CLI / PostCSS 构建 -->
    <script src="https://cdn.tailwindcss.com"></script>
    <!-- Bootstrap 5.3.x:提供现成组件(按钮/卡片/表单等) -->
    <link href="https://cdn.jsdelivr.net/npm/bootstrap@5.3.3/dist/css/bootstrap.min.css" rel="stylesheet">
    <script src="https://cdn.jsdelivr.net/npm/bootstrap@5.3.3/dist/js/bootstrap.bundle.min.js"></script>
    <!-- jQuery 4.x:DOM 操作与事件(后续章节异步请求会用到) -->
    <script src="https://code.jquery.com/jquery-4.0.0.min.js"></script>
    <!-- axios:基于 Promise 的 HTTP 客户端(后续章节异步加载数据会用到) -->
    <script src="https://cdn.jsdelivr.net/npm/axios@1.7.9/dist/axios.min.js"></script>
</head>
<body class="bg-gray-50 min-h-screen">

<!-- 居中容器:用 flex 让内容垂直水平居中,体现 grid/flex 布局约定 -->
<div class="min-h-screen flex items-center justify-center p-6">
    <!-- 卡片:Bootstrap 的 shadow + 圆角,Tailwind 控制内边距 -->
    <div class="bg-white rounded-2xl shadow-lg p-10 max-w-xl w-full text-center">
        <!--
            th:text 是 Thymeleaf 最基础的指令:把表达式的结果"作为文本"写入标签体。
            它会自动做 HTML 转义(把 < > & 等转义),防止 XSS。
            ${welcome} 读取 Model 中键名为 welcome 的值。
        -->
        <h1 class="text-3xl font-bold text-indigo-600" th:text="${welcome}">默认欢迎语(模板未渲染时显示)</h1>

        <!-- ${slogan} 读取 Model 中键名为 slogan 的值 -->
        <p class="mt-4 text-gray-600 text-lg" th:text="${slogan}">默认标语</p>

        <!-- 一个静态按钮,仅展示 Bootstrap 组件风格 -->
        <button class="btn btn-primary mt-6 px-4 py-2">进入商城</button>

        <!-- 说明:模板里写在标签之间的中文是"兜底文本",
             一旦 Thymeleaf 成功渲染,会被 th:text 的结果替换掉。
             如果浏览器里看到的是这行兜底文本,说明模板没被解析(常见原因:访问路径不对/未引入 thymeleaf 依赖)。 -->
        <p class="mt-6 text-sm text-gray-400">
            第01章 · 知识点:<code>th:text</code> 标准表达式 <code>${...}</code>
        </p>
    </div>
</div>

</body>
</html>
运行验证
步骤 1:编译打包
cd sb-thymeleaf/chapter01-intro
mvn clean package -DskipTests
步骤 2:运行应用
java -jar target/chapter01-intro-1.0.0.jar
步骤 3:浏览器访问
http://localhost:8101/
您应该看到以下页面:
- 页面标题为"第01章 · 初识 Thymeleaf"
- 居中的卡片中显示"欢迎光临 · 优选商城"(来自
${welcome}) - 副标题显示"品质好物,触手可及 —— Thymeleaf 驱动的动态页面"(来自
${slogan}) - 一个蓝色的"进入商城"按钮(Bootstrap 样式)
验证点
✅ 如果看到的是兜底文本("默认欢迎语"等),说明 Thymeleaf 未成功渲染,请检查:
spring-boot-starter-thymeleaf依赖是否正确引入xmlns:th="http://www.thymeleaf.org"命名空间是否声明- 访问路径是否正确(
/而非/index.html)
页面效果
以下截图均为本地启动后浏览器真实渲染结果。
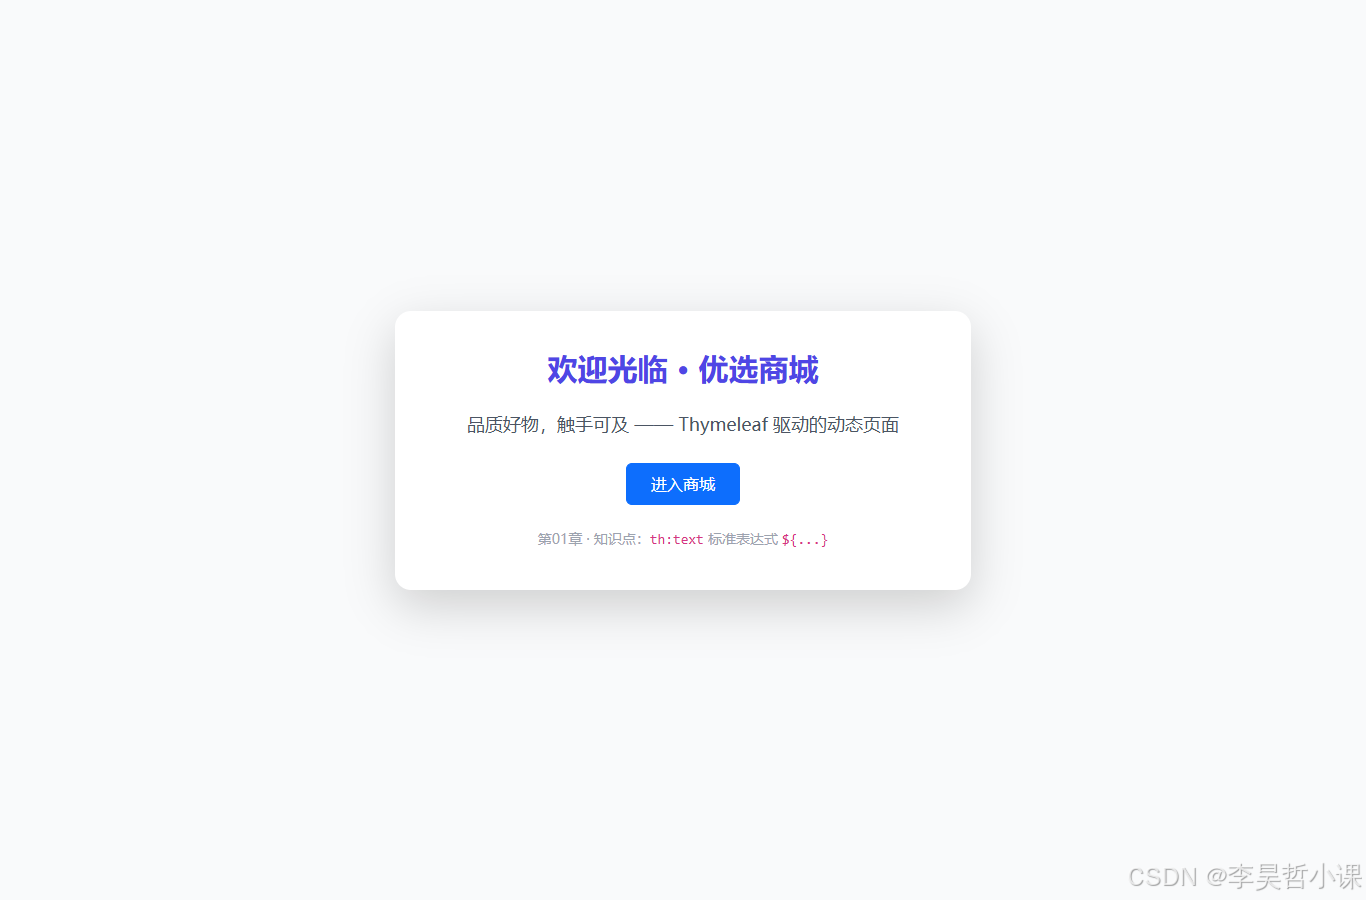
首页展示了 Thymeleaf 模板渲染后的效果:居中的卡片中显示"欢迎光临 · 优选商城"和"品质好物,触手可及 —— Thymeleaf 驱动的动态页面",以及一个蓝色的"进入商城"按钮。
常见坑
坑 1:忘记声明 Thymeleaf 命名空间
问题:模板中的 th:* 属性不起作用,浏览器显示原始标签属性。
原因:HTML 标签中没有声明 xmlns:th="http://www.thymeleaf.org" 命名空间。
解决:在每个使用 Thymeleaf 的 HTML 文件的根元素上添加:
<html lang="zh-CN" xmlns:th="http://www.thymeleaf.org">
坑 2:访问路径错误
问题:访问页面显示 404 或 Whitelabel Error Page。
原因:
- Controller 的
@GetMapping路径与浏览器访问路径不匹配 - 访问
/index.html而非/(Controller 映射的是/)
解决:
- 检查 Controller 的
@GetMapping注解,确认映射路径 - 直接访问根路径
/
坑 3:Thymeleaf 模板缓存未关闭
问题:修改模板后刷新浏览器,改动不生效。
原因:生产环境默认开启模板缓存,修改后需要重启应用。
解决:在 application.yml 中设置:
spring:
  thymeleaf:
    cache: false  # 开发期关闭缓存
坑 4:Spring Boot 4 启动器名称变更
问题:项目编译失败,提示 spring-boot-starter-web 找不到。
原因:Spring Boot 4 将 Web 启动器重命名为 spring-boot-starter-webmvc。
解决:更新 pom.xml 中的依赖:
<dependency>
    <groupId>org.springframework.boot</groupId>
    <artifactId>spring-boot-starter-webmvc</artifactId>
</dependency>
第02章 · 标准表达式
章节目标
通过本章学习,您将能够:
- 掌握标准表达式
${...}的多种用法(对象属性、列表元素、映射值) - 在 Thymeleaf 模板中读取 Model 中的各种数据类型
- 使用内联表达式在文本或属性中直接取值
- 构建"商品详情"页面,展示对象、列表、映射三者的组合
理论知识
标准表达式 ${…} 的概念
标准表达式(Standard Expression)是 Thymeleaf 的核心语法,用于从上下文(通常是 Spring Model)中读取数据。
其形式为 ${expression},其中 expression 是 OGNL(Object-Graph Navigation Language)表达式。
标准表达式的三种常见用法
1. 读取对象属性
${product.name}      <!-- 读取 product 对象的 name 属性 -->
${product.price}     <!-- 读取 product 对象的 price 属性 -->
前提:对象必须有对应的 getter 方法(如 getName()、getPrice())。
2. 读取列表元素
${list[0]}           <!-- 读取列表第 1 个元素(下标从 0 开始) -->
${list[1].name}      <!-- 读取列表第 2 个元素的 name 属性 -->
前提:对象必须是 List 类型,且支持下标访问。
3. 读取映射值
${map['key']}        <!-- 读取键为 'key' 的映射值 -->
${map['屏幕']}       <!-- 读取键为中文的映射值 -->
前提:对象必须是 Map 类型,且支持键访问。
内联取值
在标准表达式中,可以直接使用运算符和函数:
${'¥' + product.price}                    <!-- 字符串拼接 -->
${product.price > 100 ? '贵' : '便宜'}    <!-- 三元运算符 -->
${#numbers.formatDecimal(product.price, 1, 2)}  <!-- 调用工具对象 -->
表达式的执行顺序
Thymeleaf 在渲染时按以下顺序查找变量:
- 上下文变量(Context Variables):由 Controller 放入 Model 的数据
- 请求属性(Request Attributes):如 session、request 中的数据
- 会话属性(Session Attributes)
- 应用属性(Servlet Context Attributes)
项目结构
chapter02-standard/
├── pom.xml                                    # Maven 依赖配置
├── src/
│   ├── main/
│   │   ├── java/
│   │   │   └── com/lihaozhe/ch02/
│   │   │       ├── Ch02Application.java        # 启动类
│   │   │       ├── controller/
│   │   │       │   └── ProductController.java # 商品控制器
│   │   │       └── model/
│   │   │           └── Product.java           # 商品实体类
│   │   └── resources/
│   │       ├── application.yml                 # 应用配置
│   │       └── templates/
│   │           └── detail.html                 # 商品详情模板
│   └── test/                                   # 单元测试(可选)
完整代码
pom.xml
<?xml version="1.0" encoding="UTF-8"?>
<!--
  第02章:标准/变量表达式 ${}

  本章聚焦:
  - ${obj.prop}:读取对象属性
  - ${list[0]}:读取列表第1个元素
  - ${map['k']}:读取映射中键为 k 的值
  - 内联取值:直接在文本/属性里用 ${}
  通过"商品详情卡"演示一个商品对象 + 相关商品列表 + 属性映射
-->
<project xmlns="http://maven.apache.org/POM/4.0.0"
         xmlns:xsi="http://www.w3.org/2001/XMLSchema-instance"
         xsi:schemaLocation="http://maven.apache.org/POM/4.0.0 https://maven.apache.org/xsd/maven-4.0.0.xsd">
    <modelVersion>4.0.0</modelVersion>

    <!-- 继承教程根工程,共享版本管理 -->
    <parent>
        <groupId>com.lihaozhe</groupId>
        <artifactId>sb-thymeleaf</artifactId>
        <version>1.0.0</version>
    </parent>

    <artifactId>chapter02-standard</artifactId>
    <!-- Web 应用打成可执行 jar,内嵌 Tomcat,java -jar 直接跑 -->
    <packaging>jar</packaging>

    <dependencies>
        <!-- Web 启动器(Boot 4 重命名后的名称) -->
        <dependency>
            <groupId>org.springframework.boot</groupId>
            <artifactId>spring-boot-starter-webmvc</artifactId>
        </dependency>
        <!-- Thymeleaf 模板引擎:服务端渲染 HTML -->
        <dependency>
            <groupId>org.springframework.boot</groupId>
            <artifactId>spring-boot-starter-thymeleaf</artifactId>
        </dependency>
        <!-- 单元测试 -->
        <dependency>
            <groupId>org.springframework.boot</groupId>
            <artifactId>spring-boot-starter-test</artifactId>
            <scope>test</scope>
        </dependency>
    </dependencies>

    <build>
        <plugins>
            <!-- Spring Boot Maven 插件:支持 mvn spring-boot:run 和可执行 jar -->
            <plugin>
                <groupId>org.springframework.boot</groupId>
                <artifactId>spring-boot-maven-plugin</artifactId>
            </plugin>
        </plugins>
    </build>
</project>
src/main/java/com/lihaozhe/ch02/Ch02Application.java
package com.lihaozhe.ch02;

import org.springframework.boot.SpringApplication;
import org.springframework.boot.autoconfigure.SpringBootApplication;

/**
 * 第02章 启动入口。
 *
 * <p>理论知识:{@code @SpringBootApplication} 是一个组合注解,等价于同时加了
 * {@code @SpringBootConfiguration}(标记这是一个配置类)、
 * {@code @EnableAutoConfiguration}(根据 classpath 自动装配 Bean)、
 * {@code @ComponentScan}(扫描当前包及其子包下的组件)。</p>
 *
 * <p>启动类必须放在最外层包 {@code com.lihaozhe.ch02},
 * 这样 {@code @ComponentScan} 才能扫描到 controller / service 等子包中的组件。</p>
 */
@SpringBootApplication
public class Ch02Application {

    /**
     * 程序入口:SpringApplication.run 会启动内嵌 Tomcat 并初始化 Spring 容器。
     *
     * @param args 命令行参数(本教程不接收参数)
     */
    public static void main(String[] args) {
        SpringApplication.run(Ch02Application.class, args);
    }
}
src/main/java/com/lihaozhe/ch02/controller/ProductController.java
package com.lihaozhe.ch02.controller;

import com.lihaozhe.ch02.model.Product;
import org.springframework.stereotype.Controller;
import org.springframework.ui.Model;
import org.springframework.web.bind.annotation.GetMapping;

import java.math.BigDecimal;
import java.util.Arrays;
import java.util.HashMap;
import java.util.List;
import java.util.Map;

/**
 * 商品详情控制器。
 *
 * <p>理论知识:标准表达式 {@code ${...}} 是 Thymeleaf 最常用的语法。
 * 它用于从 Model(或 Web 上下文)中读取数据,支持以下几种方式——
 * 1. {@code ${obj.prop}}:读取对象属性(属性需要有 getter 方法)
 * 2. {@code ${list[0]}}:读取列表第1个元素(下标从0开始)
 * 3. {@code ${map['k']}}:读取映射中键为 k 的值
 * 4. 内联取值:在普通文本/属性中直接用 ${} 取值</p>
 */
@Controller
public class ProductController {

    /**
     * 商品详情页面。
     *
     * <p>本方法演示如何将"商品对象"、"相关商品列表"、"属性映射"放入 Model,
     * 并在模板中通过标准表达式分别读取它们。</p>
     *
     * @param model 视图模型(Spring 自动注入)
     * @return 视图名 "detail",对应 templates/detail.html
     */
    @GetMapping("/product")
    public String detail(Model model) {
        // 创建一个商品对象,模拟从数据库查询的结果
        Product product = new Product(
                1001L,
                "iPhone 15 Pro Max",
                "钛金属设计,超强续航,专业级摄像头系统",
                new BigDecimal("9999.00"),
                "Apple"
        );

        // 将商品对象放入 Model,键名为 "product"
        model.addAttribute("product", product);

        // 创建相关商品列表(演示 ${list[0]} 下标访问)
        List<Product> relatedProducts = Arrays.asList(
                new Product(1002L, "iPhone 15", "轻薄设计,性能卓越", new BigDecimal("5999.00"), "Apple"),
                new Product(1003L, "iPhone 15 Pro", "专业摄影,强劲芯片", new BigDecimal("7999.00"), "Apple"),
                new Product(1004L, "iPad Air", "大屏体验,创意无限", new BigDecimal("4599.00"), "Apple")
        );

        // 将列表放入 Model,键名为 "relatedProducts"
        model.addAttribute("relatedProducts", relatedProducts);

        // 创建商品属性映射(演示 ${map['k']} 键访问)
        Map<String, String> specs = new HashMap<>();
        specs.put("屏幕", "6.7英寸 OLED");
        specs.put("存储", "256GB");
        specs.put("处理器", "A17 Pro");
        specs.put("电池", "4441mAh");

        // 将映射放入 Model,键名为 "specs"
        model.addAttribute("specs", specs);

        // 返回视图名,Thymeleaf 会去 classpath:/templates/ 找 detail.html
        return "detail";
    }
}
src/main/java/com/lihaozhe/ch02/model/Product.java
package com.lihaozhe.ch02.model;

import java.math.BigDecimal;

/**
 * 商品实体类。
 *
 * <p>模型类用于封装数据,在 Controller 中创建并放入 Model,
 * 模板中通过变量表达式 {@code ${product.name}} 等方式读取其属性。</p>
 */
public class Product {

    /** 商品ID */
    private Long id;

    /** 商品名称 */
    private String name;

    /** 商品描述 */
    private String description;

    /** 商品价格 */
    private BigDecimal price;

    /** 商品品牌 */
    private String brand;

    /** 构造方法 */
    public Product(Long id, String name, String description, BigDecimal price, String brand) {
        this.id = id;
        this.name = name;
        this.description = description;
        this.price = price;
        this.brand = brand;
    }

    /** 获取商品ID */
    public Long getId() {
        return id;
    }

    /** 设置商品ID */
    public void setId(Long id) {
        this.id = id;
    }

    /** 获取商品名称 */
    public String getName() {
        return name;
    }

    /** 设置商品名称 */
    public void setName(String name) {
        this.name = name;
    }

    /** 获取商品描述 */
    public String getDescription() {
        return description;
    }

    /** 设置商品描述 */
    public void setDescription(String description) {
        this.description = description;
    }

    /** 获取商品价格 */
    public BigDecimal getPrice() {
        return price;
    }

    /** 设置商品价格 */
    public void setPrice(BigDecimal price) {
        this.price = price;
    }

    /** 获取商品品牌 */
    public String getBrand() {
        return brand;
    }

    /** 设置商品品牌 */
    public void setBrand(String brand) {
        this.brand = brand;
    }
}
src/main/resources/application.yml
# 第02章:标准/变量表达式
# 端口规则:8080 + 章号 2 → 8102
server:
  port: 8102

spring:
  application:
    name: chapter02-standard
  thymeleaf:
    # 开发期关闭缓存,修改模板后刷新浏览器即可看到效果(无需重启)
    cache: false
    # 模板/响应统一使用 UTF-8,保证中文不乱码
    encoding: UTF-8
    # 使用 HTML 模式解析(兼容标准 HTML5 标签)
    mode: HTML
    # 启动时校验模板是否存在、语法是否正确(开发期友好)
    check-template: true
    check-template-location: true
src/main/resources/templates/detail.html
<!DOCTYPE html>
<!--
  xmlns:th 是 Thymeleaf 的命名空间声明:只有加上它,
  th:* 属性才会被 Thymeleaf 识别并解析。IDE(如 IDEA)也会因此获得 th: 的自动补全。
-->
<html lang="zh-CN" xmlns:th="http://www.thymeleaf.org">
<head>
    <meta charset="UTF-8">
    <!-- 响应式视口,移动端按设备宽度渲染 -->
    <meta name="viewport" content="width=device-width, initial-scale=1.0">
    <title>第02章 · 标准表达式 ${}</title>

    <!-- ===== 前端框架(全部走 CDN,免构建)===== -->
    <!-- Tailwind Play CDN:教学用零配置方案;生产环境请用 Tailwind CLI / PostCSS 构建 -->
    <script src="https://cdn.tailwindcss.com"></script>
    <!-- Bootstrap 5.3.x:提供现成组件(按钮/卡片/表单等) -->
    <link href="https://cdn.jsdelivr.net/npm/bootstrap@5.3.3/dist/css/bootstrap.min.css" rel="stylesheet">
    <script src="https://cdn.jsdelivr.net/npm/bootstrap@5.3.3/dist/js/bootstrap.bundle.min.js"></script>
    <!-- jQuery 4.x:DOM 操作与事件(后续章节异步请求会用到) -->
    <script src="https://code.jquery.com/jquery-4.0.0.min.js"></script>
    <!-- axios:基于 Promise 的 HTTP 客户端(后续章节异步加载数据会用到) -->
    <script src="https://cdn.jsdelivr.net/npm/axios@1.7.9/dist/axios.min.js"></script>
</head>
<body class="bg-gray-50 min-h-screen">

<!-- 主容器:使用 Bootstrap 的 container 和 row/col 实现响应式栅格 -->
<div class="container mx-auto py-8 px-4">

    <!-- 页头 -->
    <div class="text-center mb-8">
        <h1 class="text-3xl font-bold text-indigo-600">第02章 · 标准表达式</h1>
        <p class="mt-2 text-gray-600">变量表达式 ${} 的多种读取方式</p>
    </div>

    <!-- 商品详情卡片 -->
    <div class="bg-white rounded-2xl shadow-lg p-6 mb-8">
        <h2 class="text-2xl font-bold text-gray-800 mb-4">商品详情</h2>

        <!-- ${product.name} 读取对象的 name 属性 -->
        <div class="mb-3">
            <span class="font-semibold text-gray-700">商品名称:</span>
            <span class="text-gray-900" th:text="${product.name}">商品名称占位符</span>
        </div>

        <!-- ${product.description} 读取对象的 description 属性 -->
        <div class="mb-3">
            <span class="font-semibold text-gray-700">商品描述:</span>
            <span class="text-gray-900" th:text="${product.description}">商品描述占位符</span>
        </div>

        <!-- ${product.price} 读取对象的 price 属性,内联格式化 -->
        <div class="mb-3">
            <span class="font-semibold text-gray-700">商品价格:</span>
            <span class="text-red-600 font-bold" th:text="${'¥' + product.price}">¥0.00</span>
        </div>

        <!-- ${product.brand} 读取对象的 brand 属性 -->
        <div class="mb-3">
            <span class="font-semibold text-gray-700">品牌:</span>
            <span class="text-gray-900" th:text="${product.brand}">品牌占位符</span>
        </div>
    </div>

    <!-- 属性映射 section -->
    <div class="bg-white rounded-2xl shadow-lg p-6 mb-8">
        <h2 class="text-2xl font-bold text-gray-800 mb-4">规格参数</h2>

        <!-- ${specs['屏幕']} 读取映射中键为"屏幕"的值 -->
        <div class="mb-3">
            <span class="font-semibold text-gray-700">屏幕:</span>
            <span class="text-gray-900" th:text="${specs['屏幕']}">屏幕占位符</span>
        </div>

        <!-- ${specs['存储']} 读取映射中键为"存储"的值 -->
        <div class="mb-3">
            <span class="font-semibold text-gray-700">存储:</span>
            <span class="text-gray-900" th:text="${specs['存储']}">存储占位符</span>
        </div>

        <!-- ${specs['处理器']} 读取映射中键为"处理器"的值 -->
        <div class="mb-3">
            <span class="font-semibold text-gray-700">处理器:</span>
            <span class="text-gray-900" th:text="${specs['处理器']}">处理器占位符</span>
        </div>

        <!-- ${specs['电池']} 读取映射中键为"电池"的值 -->
        <div class="mb-3">
            <span class="font-semibold text-gray-700">电池:</span>
            <span class="text-gray-900" th:text="${specs['电池']}">电池占位符</span>
        </div>
    </div>

    <!-- 相关商品 section -->
    <div class="bg-white rounded-2xl shadow-lg p-6">
        <h2 class="text-2xl font-bold text-gray-800 mb-4">相关商品</h2>

        <!-- ${relatedProducts[0].name} 读取列表第1个元素的 name 属性 -->
        <div class="mb-3">
            <span class="font-semibold text-gray-700">第1个相关商品:</span>
            <span class="text-gray-900" th:text="${relatedProducts[0].name}">相关商品1占位符</span>
        </div>

        <!-- ${relatedProducts[1].name} 读取列表第2个元素的 name 属性 -->
        <div class="mb-3">
            <span class="font-semibold text-gray-700">第2个相关商品:</span>
            <span class="text-gray-900" th:text="${relatedProducts[1].name}">相关商品2占位符</span>
        </div>

        <!-- ${relatedProducts[2].name} 读取列表第3个元素的 name 属性 -->
        <div class="mb-3">
            <span class="font-semibold text-gray-700">第3个相关商品:</span>
            <span class="text-gray-900" th:text="${relatedProducts[2].name}">相关商品3占位符</span>
        </div>
    </div>

    <!-- 说明:模板里写在标签之间的中文是"兜底文本",
         一旦 Thymeleaf 成功渲染,会被 th:text 的结果替换掉。 -->
    <div class="mt-8 text-center text-sm text-gray-400">
        第02章 · 知识点:<code>th:text</code> 标准表达式 <code>${...}</code>
    </div>
</div>

</body>
</html>
运行验证
步骤 1:编译打包
cd sb-thymeleaf/chapter02-standard
mvn clean package -DskipTests
步骤 2:运行应用
java -jar target/chapter02-standard-1.0.0.jar
步骤 3:浏览器访问
http://localhost:8102/product
您应该看到以下页面内容:
- 商品详情部分显示:
- 商品名称:iPhone 15 Pro Max
- 商品描述:钛金属设计,超强续航,专业级摄像头系统
- 商品价格:¥9999.00
- 品牌:Apple
- 规格参数部分显示:
- 屏幕:6.7英寸 OLED
- 存储:256GB
- 处理器:A17 Pro
- 电池:4441mAh
- 相关商品部分显示:
- 第1个相关商品:iPhone 15
- 第2个相关商品:iPhone 15 Pro
- 第3个相关商品:iPad Air
验证点
✅ 如果使用 ${list[0].name} 但列表为空,会抛出 IndexOutOfBoundsException
✅ 如果使用 ${map['key']} 但键不存在,会返回 null(显示为空)
页面效果
以下截图均为本地启动后浏览器真实渲染结果。
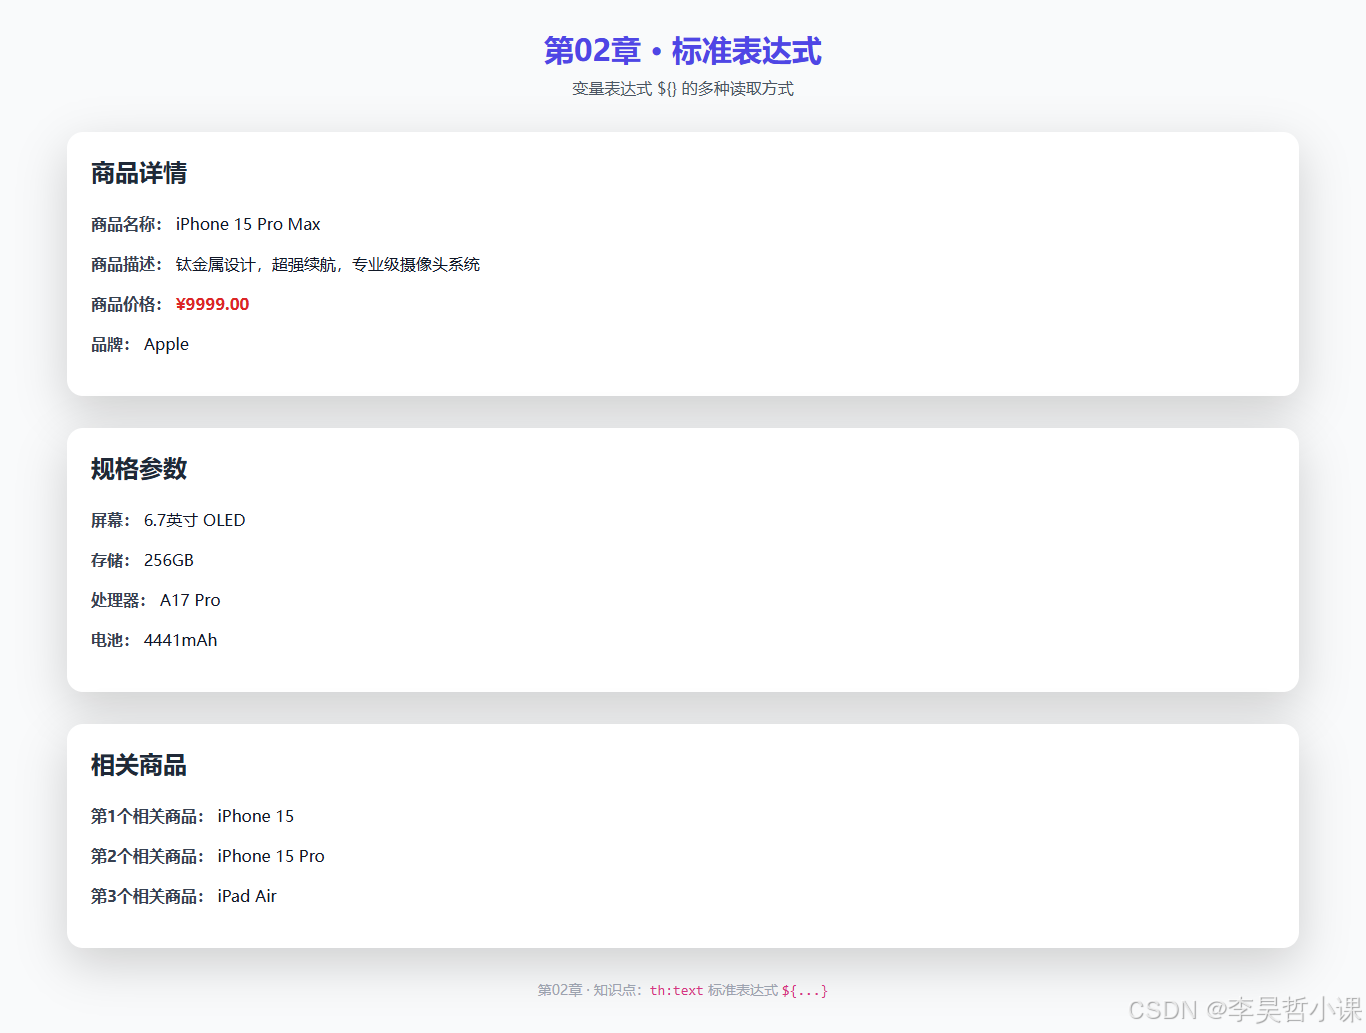
商品详情页面展示了标准表达式的三种用法:对象属性(商品名称、描述、价格、品牌)、列表元素(相关商品)和映射值(规格参数如屏幕、存储、处理器、电池)。所有数据都从后端 Model 中通过 ${...} 表达式成功读取并渲染。
常见坑
坑 1:对象属性没有 getter 方法
问题:${product.name} 报错或显示为空。
原因:Product 类缺少 getName() 方法,Thymeleaf 无法读取属性。
解决:确保每个需要访问的属性都有对应的 getter 方法:
public String getName() {
    return name;
}
坑 2:列表/映射下标越界
问题:访问 ${list[10].name} 时报 IndexOutOfBoundsException。
原因:列表只有 3 个元素,但尝试访问第 11 个元素(下标 10)。
解决:
- 使用
#lists.size(list)获取列表长度并做条件判断 - 或使用循环
th:each遍历列表(详见后续章节)
坑 3:映射键大小写敏感
问题:${specs['屏幕']} 显示为空白,但 specs 中有该键。
原因:映射的键可能包含隐藏字符或大小写不一致。
解决:
- 仔细检查键名,确保完全一致
- 使用
th:text="${specs['屏幕']}"而不是${specs["屏幕"]}(单引号或双引号均可,但需保持一致)
坑 4:OGNL 表达式中的特殊字符
问题:表达式包含特殊字符(如 #、$)时解析失败。
原因:某些字符在 OGNL 中有特殊含义,需要转义或使用工具方法。
解决:
- 使用字符串拼接:
${'¥' + product.price} - 使用工具对象:
${#numbers.formatDecimal(product.price, 1, 2)} - 避免在中文字符串中使用特殊字符
第03章 · 选择表达式
章节目标
通过本章学习,您将能够:
- 理解选择表达式
*{}的概念及其与标准表达式${}的区别 - 使用
th:object将对象绑定到模板作用域 - 在表单中通过
*{}简化属性读取 - 实现商品编辑表单的预填功能
理论知识
选择表达式 *{} 的概念
选择表达式(Selection Expression)是一种语法糖,用于简化在同一个对象上反复读取属性的场景。
其核心思想是:先通过 th:object 将一个对象"绑定"到某个标签的作用域,然后在该标签内部使用 *{} 直接读取这个对象的属性,而无需反复写 ${object.xxx}。
标准表达式 vs 选择表达式
| 特性 | 标准表达式 ${} | 选择表达式 *{} |
|---|---|---|
| 用法 | ${product.name} | * {name} (需先 th:object="${product}") |
| 作用域 | 全局上下文 | th:object 绑定的对象 |
| 优势 | 灵活,可访问任意变量 | 简洁,避免重复引用 |
| 典型应用 | 单次读取多个对象 | 表单预填、循环内反复访问同一对象 |
th:object 的工作原理
th:object="${product}" 的执行流程:
- 计算
${product}表达式,获取 product 对象 - 将 product 对象"绑定"到当前标签(及其子标签)的局部作用域
- 在子标签中使用
*{}时,Thymeleaf 会自动找到这个被绑定的对象 * {name}等价于${product.name},但代码更简洁
实际应用场景
选择表达式最适合以下情况:
- 表单预填:编辑商品时,绑定商品对象后,每个字段使用
*{}直接读取 - 循环内访问:
th:each循环中,绑定当前元素后简化属性访问 - 嵌套对象:层级较深的属性访问,可通过
th:object逐层绑定
项目结构
chapter03-selection/
├── pom.xml                                    # Maven 依赖配置
├── src/
│   ├── main/
│   │   ├── java/
│   │   │   └── com/lihaozhe/ch03/
│   │   │       ├── Ch03Application.java        # 启动类
│   │   │       ├── controller/
│   │   │       │   └── EditProductController.java # 编辑商品控制器
│   │   │       └── model/
│   │   │           └── Product.java           # 商品实体类
│   │   └── resources/
│   │       ├── application.yml                 # 应用配置
│   │       └── templates/
│   │           └── edit.html                   # 编辑商品模板
│   └── test/                                   # 单元测试(可选)
完整代码
pom.xml
<?xml version="1.0" encoding="UTF-8"?>
<!--
  第03章:选择表达式 *{}

  本章聚焦:
  - th:object 绑定商品对象到子作用域(类似"别名")
  - *{name} / *{price} 在已绑定的对象上直接读取属性,无需 ${obj.name} 的冗长写法
  - 演示"编辑商品信息"表单预填时,用 th:object + *{} 简化代码
-->
<project xmlns="http://maven.apache.org/POM/4.0.0"
         xmlns:xsi="http://www.w3.org/2001/XMLSchema-instance"
         xsi:schemaLocation="http://maven.apache.org/POM/4.0.0 https://maven.apache.org/xsd/maven-4.0.0.xsd">
    <modelVersion>4.0.0</modelVersion>

    <!-- 继承教程根工程,共享版本管理 -->
    <parent>
        <groupId>com.lihaozhe</groupId>
        <artifactId>sb-thymeleaf</artifactId>
        <version>1.0.0</version>
    </parent>

    <artifactId>chapter03-selection</artifactId>
    <!-- Web 应用打成可执行 jar,内嵌 Tomcat,java -jar 直接跑 -->
    <packaging>jar</packaging>

    <dependencies>
        <!-- Web 启动器(Boot 4 重命名后的名称) -->
        <dependency>
            <groupId>org.springframework.boot</groupId>
            <artifactId>spring-boot-starter-webmvc</artifactId>
        </dependency>
        <!-- Thymeleaf 模板引擎:服务端渲染 HTML -->
        <dependency>
            <groupId>org.springframework.boot</groupId>
            <artifactId>spring-boot-starter-thymeleaf</artifactId>
        </dependency>
        <!-- 单元测试 -->
        <dependency>
            <groupId>org.springframework.boot</groupId>
            <artifactId>spring-boot-starter-test</artifactId>
            <scope>test</scope>
        </dependency>
    </dependencies>

    <build>
        <plugins>
            <!-- Spring Boot Maven 插件:支持 mvn spring-boot:run 和可执行 jar -->
            <plugin>
                <groupId>org.springframework.boot</groupId>
                <artifactId>spring-boot-maven-plugin</artifactId>
            </plugin>
        </plugins>
    </build>
</project>
src/main/java/com/lihaozhe/ch03/Ch03Application.java
package com.lihaozhe.ch03;

import org.springframework.boot.SpringApplication;
import org.springframework.boot.autoconfigure.SpringBootApplication;

/**
 * 第03章 启动入口。
 *
 * <p>理论知识:{@code @SpringBootApplication} 是一个组合注解,等价于同时加了
 * {@code @SpringBootConfiguration}(标记这是一个配置类)、
 * {@code @EnableAutoConfiguration}(根据 classpath 自动装配 Bean)、
 * {@code @ComponentScan}(扫描当前包及其子包下的组件)。</p>
 *
 * <p>启动类必须放在最外层包 {@code com.lihaozhe.ch03},
 * 这样 {@code @ComponentScan} 才能扫描到 controller / service 等子包中的组件。</p>
 */
@SpringBootApplication
public class Ch03Application {

    /**
     * 程序入口:SpringApplication.run 会启动内嵌 Tomcat 并初始化 Spring 容器。
     *
     * @param args 命令行参数(本教程不接收参数)
     */
    public static void main(String[] args) {
        SpringApplication.run(Ch03Application.class, args);
    }
}
src/main/java/com/lihaozhe/ch03/controller/EditProductController.java
package com.lihaozhe.ch03.controller;

import com.lihaozhe.ch03.model.Product;
import org.springframework.stereotype.Controller;
import org.springframework.ui.Model;
import org.springframework.web.bind.annotation.GetMapping;

import java.math.BigDecimal;

/**
 * 编辑商品控制器。
 *
 * <p>理论知识:选择表达式 {@code *{...}} 与标准表达式 {@code ${...}} 的区别——
 * 1. 需要先通过 {@code th:object} 把一个对象(通常是表单数据)绑定到当前标签作用域
 * 2. 然后在子标签里用 {@code *{prop}} 直接读取该对象的属性,等价于 {@code ${object.prop}}
 * 3. 优势:代码更简洁,尤其是表单里要反复引用同一个对象时
 *
 * 实际场景:编辑商品表单,用 th:object 绑定商品后,每个字段用 *{name} *{price} 等直接读取</p>
 */
@Controller
public class EditProductController {

    /**
     * 编辑商品信息页面。
     *
     * <p>本方法演示如何在模板中通过 th:object 绑定商品对象,
     * 然后用 *{} 选择表达式简化字段读取,实现表单预填。</p>
     *
     * @param model 视图模型(Spring 自动注入)
     * @return 视图名 "edit",对应 templates/edit.html
     */
    @GetMapping("/edit")
    public String edit(Model model) {
        // 创建一个商品对象,模拟从数据库查询的待编辑数据
        Product product = new Product(
                2001L,
                "MacBook Air M3",
                "超轻薄设计,强劲性能,全天候电池续航",
                new BigDecimal("8999.00"),
                "Apple"
        );

        // 将商品对象放入 Model,键名为 "product"
        // 模板中通过 th:object="${product}" 绑定后,
        // 子标签可以用 *{name} *{price} 直接读取,无需反复写 ${product.xxx}
        model.addAttribute("product", product);

        // 返回视图名,Thymeleaf 会去 classpath:/templates/ 找 edit.html
        return "edit";
    }
}
src/main/java/com/lihaozhe/ch03/model/Product.java
package com.lihaozhe.ch03.model;

import java.math.BigDecimal;

/**
 * 商品实体类。
 *
 * <p>模型类用于封装数据,在 Controller 中创建并放入 Model,
 * 模板中通过选择表达式 {@code *{name}} 等方式读取其属性。</p>
 */
public class Product {

    /** 商品ID */
    private Long id;

    /** 商品名称 */
    private String name;

    /** 商品描述 */
    private String description;

    /** 商品价格 */
    private BigDecimal price;

    /** 商品品牌 */
    private String brand;

    /** 构造方法 */
    public Product(Long id, String name, String description, BigDecimal price, String brand) {
        this.id = id;
        this.name = name;
        this.description = description;
        this.price = price;
        this.brand = brand;
    }

    /** 获取商品ID */
    public Long getId() {
        return id;
    }

    /** 设置商品ID */
    public void setId(Long id) {
        this.id = id;
    }

    /** 获取商品名称 */
    public String getName() {
        return name;
    }

    /** 设置商品名称 */
    public void setName(String name) {
        this.name = name;
    }

    /** 获取商品描述 */
    public String getDescription() {
        return description;
    }

    /** 设置商品描述 */
    public void setDescription(String description) {
        this.description = description;
    }

    /** 获取商品价格 */
    public BigDecimal getPrice() {
        return price;
    }

    /** 设置商品价格 */
    public void setPrice(BigDecimal price) {
        this.price = price;
    }

    /** 获取商品品牌 */
    public String getBrand() {
        return brand;
    }

    /** 设置商品品牌 */
    public void setBrand(String brand) {
        this.brand = brand;
    }
}
src/main/resources/application.yml
# 第03章:选择表达式
# 端口规则:8080 + 章号 3 → 8103
server:
  port: 8103

spring:
  application:
    name: chapter03-selection
  thymeleaf:
    # 开发期关闭缓存,修改模板后刷新浏览器即可看到效果(无需重启)
    cache: false
    # 模板/响应统一使用 UTF-8,保证中文不乱码
    encoding: UTF-8
    # 使用 HTML 模式解析(兼容标准 HTML5 标签)
    mode: HTML
    # 启动时校验模板是否存在、语法是否正确(开发期友好)
    check-template: true
    check-template-location: true
src/main/resources/templates/edit.html
<!DOCTYPE html>
<!--
  xmlns:th 是 Thymeleaf 的命名空间声明:只有加上它,
  th:* 属性才会被 Thymeleaf 识别并解析。IDE(如 IDEA)也会因此获得 th: 的自动补全。
-->
<html lang="zh-CN" xmlns:th="http://www.thymeleaf.org">
<head>
    <meta charset="UTF-8">
    <!-- 响应式视口,移动端按设备宽度渲染 -->
    <meta name="viewport" content="width=device-width, initial-scale=1.0">
    <title>第03章 · 选择表达式 *{}</title>

    <!-- ===== 前端框架(全部走 CDN,免构建)===== -->
    <!-- Tailwind Play CDN:教学用零配置方案;生产环境请用 Tailwind CLI / PostCSS 构建 -->
    <script src="https://cdn.tailwindcss.com"></script>
    <!-- Bootstrap 5.3.x:提供现成组件(按钮/卡片/表单等) -->
    <link href="https://cdn.jsdelivr.net/npm/bootstrap@5.3.3/dist/css/bootstrap.min.css" rel="stylesheet">
    <script src="https://cdn.jsdelivr.net/npm/bootstrap@5.3.3/dist/js/bootstrap.bundle.min.js"></script>
    <!-- jQuery 4.x:DOM 操作与事件(后续章节异步请求会用到) -->
    <script src="https://code.jquery.com/jquery-4.0.0.min.js"></script>
    <!-- axios:基于 Promise 的 HTTP 客户端(后续章节异步加载数据会用到) -->
    <script src="https://cdn.jsdelivr.net/npm/axios@1.7.9/dist/axios.min.js"></script>
</head>
<body class="bg-gray-50 min-h-screen">

<!-- 主容器:使用 Bootstrap 的 container 和 row/col 实现响应式栅格 -->
<div class="container mx-auto py-8 px-4 max-w-2xl">

    <!-- 页头 -->
    <div class="text-center mb-8">
        <h1 class="text-3xl font-bold text-indigo-600">第03章 · 选择表达式</h1>
        <p class="mt-2 text-gray-600">th:object + *{} 实现表单预填</p>
    </div>

    <!--
        表单卡片
        关键:th:object="${product}" 把 product 对象绑定到整个 form 作用域
        之后在 form 内部的标签里,可以直接用 *{name} *{price} 等读取属性
        等价于 ${product.name} ${product.price},但代码更简洁
    -->
    <div class="bg-white rounded-2xl shadow-lg p-6">
        <h2 class="text-2xl font-bold text-gray-800 mb-6">编辑商品信息</h2>

        <!--
            th:object 绑定商品对象:之后 *{...} 就相对于这个对象
            等价于在 form 内部创建了一个临时的 "this" 指针指向 product
        -->
        <form th:object="${product}" class="space-y-4">

            <!-- *{id} 读取绑定对象的 id 属性,用于隐藏域或显示 -->
            <div class="mb-4">
                <label class="block text-sm font-semibold text-gray-700 mb-2">商品ID</label>
                <!-- th:value="*{id}" 将 id 属性值预填到输入框 -->
                <input type="text" class="form-control" th:value="*{id}" readonly>
            </div>

            <!-- *{name} 读取绑定对象的 name 属性 -->
            <div class="mb-4">
                <label class="block text-sm font-semibold text-gray-700 mb-2">商品名称</label>
                <!-- th:value="*{name}" 将 name 属性值预填到输入框 -->
                <input type="text" class="form-control" th:value="*{name}" placeholder="请输入商品名称">
            </div>

            <!-- *{description} 读取绑定对象的 description 属性 -->
            <div class="mb-4">
                <label class="block text-sm font-semibold text-gray-700 mb-2">商品描述</label>
                <!-- th:text="*{description}" 将 description 属性值预填到文本域 -->
                <textarea class="form-control" rows="3" th:text="*{description}" placeholder="请输入商品描述"></textarea>
            </div>

            <!-- *{price} 读取绑定对象的 price 属性 -->
            <div class="mb-4">
                <label class="block text-sm font-semibold text-gray-700 mb-2">商品价格</label>
                <!-- th:value="*{price}" 将 price 属性值预填到输入框 -->
                <input type="number" step="0.01" class="form-control" th:value="*{price}" placeholder="请输入商品价格">
            </div>

            <!-- *{brand} 读取绑定对象的 brand 属性 -->
            <div class="mb-6">
                <label class="block text-sm font-semibold text-gray-700 mb-2">品牌</label>
                <!-- th:value="*{brand}" 将 brand 属性值预填到输入框 -->
                <input type="text" class="form-control" th:value="*{brand}" placeholder="请输入品牌">
            </div>

            <!-- 提交按钮(仅展示,本教程不实际提交) -->
            <button type="submit" class="btn btn-primary w-full py-2">保存修改</button>
        </form>
    </div>

    <!-- 说明:模板里写在标签之间的中文是"兜底文本",
         一旦 Thymeleaf 成功渲染,会被 th:value 或 th:text 的结果替换掉。 -->
    <div class="mt-8 text-center text-sm text-gray-400">
        第03章 · 知识点:<code>th:object</code> + <code>*{...}</code> 选择表达式
    </div>
</div>

</body>
</html>
运行验证
步骤 1:编译打包
cd sb-thymeleaf/chapter03-selection
mvn clean package -DskipTests
步骤 2:运行应用
java -jar target/chapter03-selection-1.0.0.jar
步骤 3:浏览器访问
http://localhost:8103/edit
您应该看到以下页面内容:
- 商品ID 输入框显示:2001(只读)
- 商品名称 输入框显示:MacBook Air M3
- 商品描述 文本域显示:超轻薄设计,强劲性能,全天候电池续航
- 商品价格 输入框显示:8999.00
- 品牌 输入框显示:Apple
- 所有字段都已预填,用户可以修改后提交
验证点
✅ 如果 th:object 缺失,则 *{} 无法工作,字段显示为空
✅ 如果 Product 类缺少 getter 方法,则 *{} 读取失败
页面效果
以下截图均为本地启动后浏览器真实渲染结果。
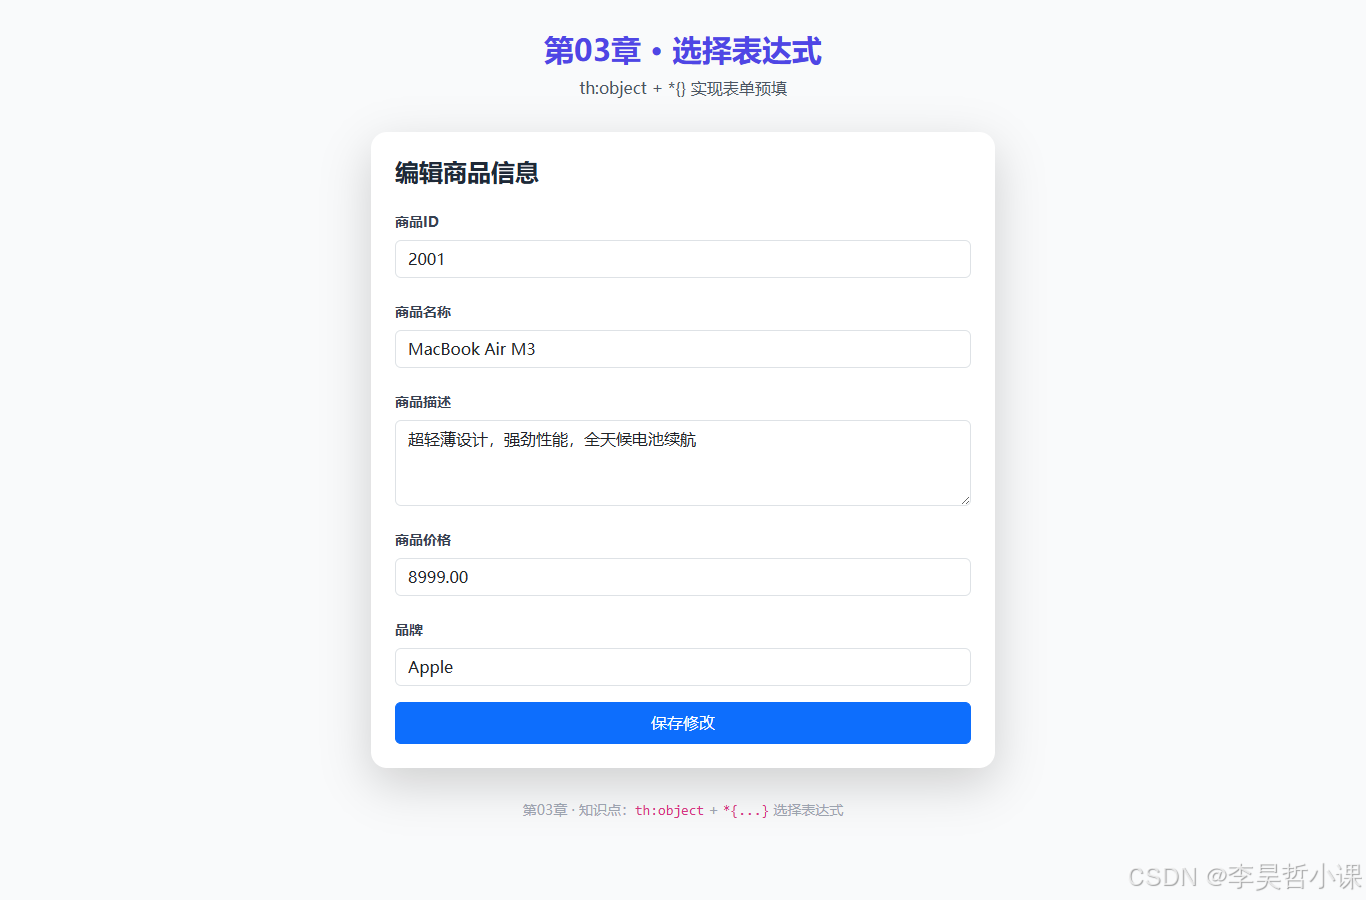
编辑表单页面展示了选择表达式的用法:通过 th:object="${product}" 将商品对象绑定到表单作用域后,各个字段(商品ID、名称、描述、价格、品牌)使用 *{...} 直接读取属性值进行预填,无需重复写 ${product.xxx}。
常见坑
坑 1:忘记使用 th:object 绑定对象
问题:*{name} 读取失败,字段显示为空。
原因:在使用选择表达式之前,没有通过 th:object 绑定对象。
解决:确保在使用 *{} 之前,父标签上声明了 th:object="${objectName}":
<form th:object="${product}">
    <input th:value="*{name}">  <!-- 现在可以工作了 -->
</form>
坑 2:th:object 绑定的对象没有 getter 方法
问题:*{name} 报错或显示为空。
原因:被绑定的对象缺少属性对应的 getter 方法。
解决:确保对象类有完整的 getter 方法:
public String getName() {
    return name;
}
坑 3:选择表达式嵌套使用
问题:尝试在 *{} 内部再使用 *{} 或 ${} 时出错。
原因:选择表达式已绑定到对象,无法再嵌套选择。
解决:
- 如果需要访问另一个对象,改用标准表达式:
${otherObject.prop} - 或使用
#object变量:*{name}等价于${#object.name},其中#object指向被绑定的对象
坑 4:th:object 作用域理解错误
问题:在 th:object 外部使用 *{} 时失败。
原因:*{} 只在 th:object 绑定的标签及其子标签中有效。
解决:确保 *{} 在正确的作用域内使用:
<div th:object="${product}">
    <span th:text="*{name}"></span>  <!-- ✓ 在作用域内 -->
</div>
<span th:text="*{name}"></span>  <!-- ✗ 在作用域外,会失败 -->
第04章 · 链接表达式
章节目标
通过本章学习,您将能够:
- 掌握链接表达式
@{}的语法和用法 - 生成相对路径链接和带路径变量的动态链接
- 使用
th:href替代 HTML 的href属性 - 实现商品列表到详情页的跳转功能
理论知识
链接表达式 @{} 的概念
链接表达式(Link Expression)是 Thymeleaf 用于生成 URL 的标准方式。
与手动拼接字符串相比,它更安全、更灵活,能自动处理上下文路径、支持路径变量和查询参数。
链接表达式的语法
1. 相对路径链接
@{ /products} <!-- 生成相对路径链接,自动加上下文前缀 -->
例如:如果应用部署在 /shop 上下文下,@{ /products} 会生成 /shop/products。
2. 带路径变量的链接
@{/product/{id}(id=${p.id})} <!-- 路径变量 + 占位符 -->
例如:若 p.id = 3001,则生成 /product/3001。
3. 带查询参数的链接
@{/search?keyword=${kw}} <!-- 查询参数 -->
例如:若 kw = "iPhone",则生成 /search?keyword=iPhone。
th:href vs href
| 特性 | href | th:href |
|---|---|---|
| 动态生成 | ✗ 不支持 | ✓ 支持 |
| 路径变量 | ✗ 手动拼接 | ✓ 自动处理 |
| 上下文前缀 | ✗ 需要手动加 | ✓ 自动加 |
| 使用场景 | 静态链接 | 动态链接 |
链接表达式的优势
- 自动上下文处理:无论应用部署在什么路径下,链接都能正确生成
- 类型安全:路径变量从对象属性动态获取,避免硬编码错误
- 可读性强:语法清晰,意图明确
- 防错:无需手动拼接字符串,减少拼写错误和 URL 编码问题
项目结构
chapter04-link/
├── pom.xml                                    # Maven 依赖配置
├── src/
│   ├── main/
│   │   ├── java/
│   │   │   └── com/lihaozhe/ch04/
│   │   │       ├── Ch04Application.java        # 启动类
│   │   │       ├── controller/
│   │   │       │   └── ProductController.java # 商品控制器
│   │   │       └── model/
│   │   │           └── Product.java           # 商品实体类
│   │   └── resources/
│   │       ├── application.yml                 # 应用配置
│   │       └── templates/
│   │           ├── list.html                  # 商品列表模板
│   │           └── detail.html                 # 商品详情模板
│   └── test/                                   # 单元测试(可选)
完整代码
pom.xml
<?xml version="1.0" encoding="UTF-8"?>
<!--
  第04章:链接表达式 @{}

  本章聚焦:
  - @{/products}:生成相对路径的链接
  - @{/product/{id}(id=${p.id})}:带路径变量和查询参数
  - th:href:替代 HTML 的 href 属性,支持动态链接生成
  演示商品列表 → 详情跳转
-->
<project xmlns="http://maven.apache.org/POM/4.0.0"
         xmlns:xsi="http://www.w3.org/2001/XMLSchema-instance"
         xsi:schemaLocation="http://maven.apache.org/POM/4.0.0 https://maven.apache.org/xsd/maven-4.0.0.xsd">
    <modelVersion>4.0.0</modelVersion>

    <!-- 继承教程根工程,共享版本管理 -->
    <parent>
        <groupId>com.lihaozhe</groupId>
        <artifactId>sb-thymeleaf</artifactId>
        <version>1.0.0</version>
    </parent>

    <artifactId>chapter04-link</artifactId>
    <!-- Web 应用打成可执行 jar,内嵌 Tomcat,java -jar 直接跑 -->
    <packaging>jar</packaging>

    <dependencies>
        <!-- Web 启动器(Boot 4 重命名后的名称) -->
        <dependency>
            <groupId>org.springframework.boot</groupId>
            <artifactId>spring-boot-starter-webmvc</artifactId>
        </dependency>
        <!-- Thymeleaf 模板引擎:服务端渲染 HTML -->
        <dependency>
            <groupId>org.springframework.boot</groupId>
            <artifactId>spring-boot-starter-thymeleaf</artifactId>
        </dependency>
        <!-- 单元测试 -->
        <dependency>
            <groupId>org.springframework.boot</groupId>
            <artifactId>spring-boot-starter-test</artifactId>
            <scope>test</scope>
        </dependency>
    </dependencies>

    <build>
        <plugins>
            <!-- Spring Boot Maven 插件:支持 mvn spring-boot:run 和可执行 jar -->
            <plugin>
                <groupId>org.springframework.boot</groupId>
                <artifactId>spring-boot-maven-plugin</artifactId>
            </plugin>
        </plugins>
    </build>
</project>
src/main/java/com/lihaozhe/ch04/Ch04Application.java
package com.lihaozhe.ch04;

import org.springframework.boot.SpringApplication;
import org.springframework.boot.autoconfigure.SpringBootApplication;

/**
 * 第04章 启动入口。
 *
 * <p>理论知识:{@code @SpringBootApplication} 是一个组合注解,等价于同时加了
 * {@code @SpringBootConfiguration}(标记这是一个配置类)、
 * {@code @EnableAutoConfiguration}(根据 classpath 自动装配 Bean)、
 * {@code @ComponentScan}(扫描当前包及其子包下的组件)。</p>
 *
 * <p>启动类必须放在最外层包 {@code com.lihaozhe.ch04},
 * 这样 {@code @ComponentScan} 才能扫描到 controller / service 等子包中的组件。</p>
 */
@SpringBootApplication
public class Ch04Application {

    /**
     * 程序入口:SpringApplication.run 会启动内嵌 Tomcat 并初始化 Spring 容器。
     *
     * @param args 命令行参数(本教程不接收参数)
     */
    public static void main(String[] args) {
        SpringApplication.run(Ch04Application.class, args);
    }
}
src/main/java/com/lihaozhe/ch04/controller/ProductController.java
package com.lihaozhe.ch04.controller;

import com.lihaozhe.ch04.model.Product;
import org.springframework.stereotype.Controller;
import org.springframework.ui.Model;
import org.springframework.web.bind.annotation.GetMapping;
import org.springframework.web.bind.annotation.PathVariable;

import java.math.BigDecimal;
import java.util.Arrays;
import java.util.List;

/**
 * 商品列表与详情控制器。
 *
 * <p>理论知识:链接表达式 {@code @{/...}} 是 Thymeleaf 用于生成 URL 的标准方式。
 * 它自动处理上下文路径、支持路径变量和查询参数,比手写字符串拼接更安全可靠。
 *
 * 语法示例:
 * 1. {@code @{/products}}:生成相对路径链接(自动加上下文前缀)
 * 2. {@code @{/product/{id}(id=${p.id})}}:生成带路径变量的链接
 *    - {id} 是路径占位符,会被 (id=${p.id}) 的值替换
 * 3. {@code @{/search?keyword=${kw}}}:生成带查询参数的链接</p>
 */
@Controller
public class ProductController {

    /**
     * 商品列表页面。
     *
     * <p>本方法演示如何列出所有商品,并为每个商品生成指向详情页的链接。
     * 链接通过 th:href="@{/product/{id}(id=${p.id})}" 实现动态生成。</p>
     *
     * @param model 视图模型(Spring 自动注入)
     * @return 视图名 "list",对应 templates/list.html
     */
    @GetMapping("/products")
    public String list(Model model) {
        // 创建商品列表,模拟从数据库查询的结果
        List<Product> products = Arrays.asList(
                new Product(3001L, "iPhone 15 Pro", "专业级摄影,钛金属设计", new BigDecimal("7999.00"), "Apple"),
                new Product(3002L, "Samsung Galaxy S24", "AI 智能,超视觉夜拍", new BigDecimal("6999.00"), "Samsung"),
                new Product(3003L, "Xiaomi 14 Pro", "徕卡影像,性能怪兽", new BigDecimal("4999.00"), "Xiaomi"),
                new Product(3004L, "Huawei Mate 60 Pro", "卫星通信,鸿蒙系统", new BigDecimal("6999.00"), "Huawei")
        );

        // 将商品列表放入 Model,键名为 "products"
        model.addAttribute("products", products);

        // 返回视图名,Thymeleaf 会去 classpath:/templates/ 找 list.html
        return "list";
    }

    /**
     * 商品详情页面。
     *
     * <p>本方法接收路径变量 id,查询对应商品并返回详情页。</p>
     *
     * @param id 商品ID(从 URL 路径中提取,如 /product/3001)
     * @param model 视图模型(Spring 自动注入)
     * @return 视图名 "detail",对应 templates/detail.html
     */
    @GetMapping("/product/{id}")
    public String detail(@PathVariable("id") Long id, Model model) {
        // 根据 ID 查询商品(这里为了教学简化为硬编码)
        Product product = new Product(
                id,
                switch (id.intValue()) {
                    case 3001 -> "iPhone 15 Pro";
                    case 3002 -> "Samsung Galaxy S24";
                    case 3003 -> "Xiaomi 14 Pro";
                    case 3004 -> "Huawei Mate 60 Pro";
                    default -> "未知商品";
                },
                "高性能智能手机,满足您的各种需求",
                new BigDecimal("6999.00"),
                "品牌"
        );

        // 将商品对象放入 Model,键名为 "product"
        model.addAttribute("product", product);

        // 返回视图名,Thymeleaf 会去 classpath:/templates/ 找 detail.html
        return "detail";
    }
}
src/main/java/com/lihaozhe/ch04/model/Product.java
package com.lihaozhe.ch04.model;

import java.math.BigDecimal;

/**
 * 商品实体类。
 *
 * <p>模型类用于封装数据,在 Controller 中创建并放入 Model,
 * 模板中通过链接表达式 {@code @{/product/{id}(id=${p.id})}} 等方式读取其属性生成链接。</p>
 */
public class Product {

    /** 商品ID */
    private Long id;

    /** 商品名称 */
    private String name;

    /** 商品描述 */
    private String description;

    /** 商品价格 */
    private BigDecimal price;

    /** 商品品牌 */
    private String brand;

    /** 构造方法 */
    public Product(Long id, String name, String description, BigDecimal price, String brand) {
        this.id = id;
        this.name = name;
        this.description = description;
        this.price = price;
        this.brand = brand;
    }

    /** 获取商品ID */
    public Long getId() {
        return id;
    }

    /** 设置商品ID */
    public void setId(Long id) {
        this.id = id;
    }

    /** 获取商品名称 */
    public String getName() {
        return name;
    }

    /** 设置商品名称 */
    public void setName(String name) {
        this.name = name;
    }

    /** 获取商品描述 */
    public String getDescription() {
        return description;
    }

    /** 设置商品描述 */
    public void setDescription(String description) {
        this.description = description;
    }

    /** 获取商品价格 */
    public BigDecimal getPrice() {
        return price;
    }

    /** 设置商品价格 */
    public void setPrice(BigDecimal price) {
        this.price = price;
    }

    /** 获取商品品牌 */
    public String getBrand() {
        return brand;
    }

    /** 设置商品品牌 */
    public void setBrand(String brand) {
        this.brand = brand;
    }
}
src/main/resources/application.yml
# 第04章:链接表达式
# 端口规则:8080 + 章号 4 → 8104
server:
  port: 8104

spring:
  application:
    name: chapter04-link
  thymeleaf:
    # 开发期关闭缓存,修改模板后刷新浏览器即可看到效果(无需重启)
    cache: false
    # 模板/响应统一使用 UTF-8,保证中文不乱码
    encoding: UTF-8
    # 使用 HTML 模式解析(兼容标准 HTML5 标签)
    mode: HTML
    # 启动时校验模板是否存在、语法是否正确(开发期友好)
    check-template: true
    check-template-location: true
src/main/resources/templates/list.html
<!DOCTYPE html>
<!--
  xmlns:th 是 Thymeleaf 的命名空间声明:只有加上它,
  th:* 属性才会被 Thymeleaf 识别并解析。IDE(如 IDEA)也会因此获得 th: 的自动补全。
-->
<html lang="zh-CN" xmlns:th="http://www.thymeleaf.org">
<head>
    <meta charset="UTF-8">
    <!-- 响应式视口,移动端按设备宽度渲染 -->
    <meta name="viewport" content="width=device-width, initial-scale=1.0">
    <title>第04章 · 链接表达式 @{}</title>

    <!-- ===== 前端框架(全部走 CDN,免构建)===== -->
    <!-- Tailwind Play CDN:教学用零配置方案;生产环境请用 Tailwind CLI / PostCSS 构建 -->
    <script src="https://cdn.tailwindcss.com"></script>
    <!-- Bootstrap 5.3.x:提供现成组件(按钮/卡片/表单等) -->
    <link href="https://cdn.jsdelivr.net/npm/bootstrap@5.3.3/dist/css/bootstrap.min.css" rel="stylesheet">
    <script src="https://cdn.jsdelivr.net/npm/bootstrap@5.3.3/dist/js/bootstrap.bundle.min.js"></script>
    <!-- jQuery 4.x:DOM 操作与事件(后续章节异步请求会用到) -->
    <script src="https://code.jquery.com/jquery-4.0.0.min.js"></script>
    <!-- axios:基于 Promise 的 HTTP 客户端(后续章节异步加载数据会用到) -->
    <script src="https://cdn.jsdelivr.net/npm/axios@1.7.9/dist/axios.min.js"></script>
</head>
<body class="bg-gray-50 min-h-screen">

<!-- 主容器:使用 Bootstrap 的 container 和 row/col 实现响应式栅格 -->
<div class="container mx-auto py-8 px-4">

    <!-- 页头 -->
    <div class="text-center mb-8">
        <h1 class="text-3xl font-bold text-indigo-600">第04章 · 链接表达式</h1>
        <p class="mt-2 text-gray-600">th:href + @{} 动态生成商品链接</p>
    </div>

    <!-- 商品列表卡片网格 -->
    <div class="grid grid-cols-1 md:grid-cols-2 lg:grid-cols-3 gap-6 mb-8">

        <!-- 遍历商品列表,为每个商品生成一个卡片 -->
        <div th:each="p : ${products}" class="bg-white rounded-2xl shadow-lg p-6 hover:shadow-xl transition-shadow">

            <!-- 商品名称 -->
            <h3 class="text-xl font-bold text-gray-800 mb-2" th:text="${p.name}">商品名称占位符</h3>

            <!-- 商品描述 -->
            <p class="text-gray-600 text-sm mb-3" th:text="${p.description}">商品描述占位符</p>

            <!-- 商品价格 -->
            <div class="text-red-600 font-bold text-lg mb-4" th:text="${'¥' + p.price}">¥0.00</div>

            <!--
                关键:th:href 使用链接表达式 @{} 生成动态链接
                @{/product/{id}(id=${p.id})} 会被解析成 /product/3001 这样的 URL
                {id} 是路径变量占位符,从 (id=${p.id}) 中获取实际值
            -->
            <a th:href="@{/product/{id}(id=${p.id})}" class="btn btn-primary w-full">
                查看详情
            </a>
        </div>
    </div>

    <!-- 返回列表链接(演示 @{/products} 生成相对路径) -->
    <div class="text-center">
        <a th:href="@{/products}" class="text-indigo-600 hover:text-indigo-800 font-semibold">
            ← 返回商品列表
        </a>
    </div>

    <!-- 说明:模板里写在标签之间的中文是"兜底文本",
         一旦 Thymeleaf 成功渲染,会被 th:text 或 th:href 的结果替换掉。 -->
    <div class="mt-8 text-center text-sm text-gray-400">
        第04章 · 知识点:<code>th:href</code> + <code>@{/path/{var}(var=${...})}</code>
    </div>
</div>

</body>
</html>
src/main/resources/templates/detail.html
<!DOCTYPE html>
<!--
  xmlns:th 是 Thymeleaf 的命名空间声明:只有加上它,
  th:* 属性才会被 Thymeleaf 识别并解析。IDE(如 IDEA)也会因此获得 th: 的自动补全。
-->
<html lang="zh-CN" xmlns:th="http://www.thymeleaf.org">
<head>
    <meta charset="UTF-8">
    <!-- 响应式视口,移动端按设备宽度渲染 -->
    <meta name="viewport" content="width=device-width, initial-scale=1.0">
    <title>第04章 · 商品详情</title>

    <!-- ===== 前端框架(全部走 CDN,免构建)===== -->
    <!-- Tailwind Play CDN:教学用零配置方案;生产环境请用 Tailwind CLI / PostCSS 构建 -->
    <script src="https://cdn.tailwindcss.com"></script>
    <!-- Bootstrap 5.3.x:提供现成组件(按钮/卡片/表单等) -->
    <link href="https://cdn.jsdelivr.net/npm/bootstrap@5.3.3/dist/css/bootstrap.min.css" rel="stylesheet">
    <script src="https://cdn.jsdelivr.net/npm/bootstrap@5.3.3/dist/js/bootstrap.bundle.min.js"></script>
    <!-- jQuery 4.x:DOM 操作与事件(后续章节异步请求会用到) -->
    <script src="https://code.jquery.com/jquery-4.0.0.min.js"></script>
    <!-- axios:基于 Promise 的 HTTP 客户端(后续章节异步加载数据会用到) -->
    <script src="https://cdn.jsdelivr.net/npm/axios@1.7.9/dist/axios.min.js"></script>
</head>
<body class="bg-gray-50 min-h-screen">

<!-- 主容器:使用 Bootstrap 的 container 和 row/col 实现响应式栅格 -->
<div class="container mx-auto py-8 px-4 max-w-3xl">

    <!-- 页头 -->
    <div class="text-center mb-8">
        <h1 class="text-3xl font-bold text-indigo-600">商品详情</h1>
    </div>

    <!-- 商品详情卡片 -->
    <div class="bg-white rounded-2xl shadow-lg p-8">

        <!-- 商品ID(用于演示链接表达式接收到的参数) -->
        <div class="mb-4 text-sm text-gray-500">
            <span class="font-semibold">商品ID:</span>
            <span th:text="${product.id}">0</span>
        </div>

        <!-- 商品名称 -->
        <h2 class="text-2xl font-bold text-gray-800 mb-4" th:text="${product.name}">商品名称占位符</h2>

        <!-- 商品描述 -->
        <p class="text-gray-600 mb-6" th:text="${product.description}">商品描述占位符</p>

        <!-- 商品价格 -->
        <div class="mb-6">
            <span class="text-gray-700 font-semibold">价格:</span>
            <span class="text-red-600 font-bold text-2xl" th:text="${'¥' + product.price}">¥0.00</span>
        </div>

        <!-- 返回商品列表(演示 @{/products} 生成相对路径链接) -->
        <a th:href="@{/products}" class="btn btn-secondary">
            ← 返回商品列表
        </a>
    </div>

    <!-- 说明:模板里写在标签之间的中文是"兜底文本",
         一旦 Thymeleaf 成功渲染,会被 th:text 的结果替换掉。 -->
    <div class="mt-8 text-center text-sm text-gray-400">
        第04章 · 知识点:<code>@{/product/{id}(id=${p.id})}</code> 路径变量链接
    </div>
</div>

</body>
</html>
运行验证
步骤 1:编译打包
cd sb-thymeleaf/chapter04-link
mvn clean package -DskipTests
步骤 2:运行应用
java -jar target/chapter04-link-1.0.0.jar
步骤 3:浏览器访问
商品列表页面
http://localhost:8104/products
您应该看到:
- 4 个商品卡片,每个包含名称、描述、价格和"查看详情"按钮
- 每个"查看详情"按钮的链接类似于
http://localhost:8104/product/3001
商品详情页面
点击任意一个"查看详情"按钮,或访问:
http://localhost:8104/product/3001
您应该看到:
- 商品ID:3001
- 商品名称:iPhone 15 Pro
- 商品描述:高性能智能手机,满足您的各种需求
- 价格:¥6999.00
- "返回商品列表"链接,点击后返回
/products
验证点
✅ 如果使用 @{/product/3001} 而非 @{/product/{id}(id=${p.id})},则链接是静态的
✅ 如果 Controller 路径变量名与模板中不一致,会报错
页面效果
以下截图均为本地启动后浏览器真实渲染结果。
商品列表页面
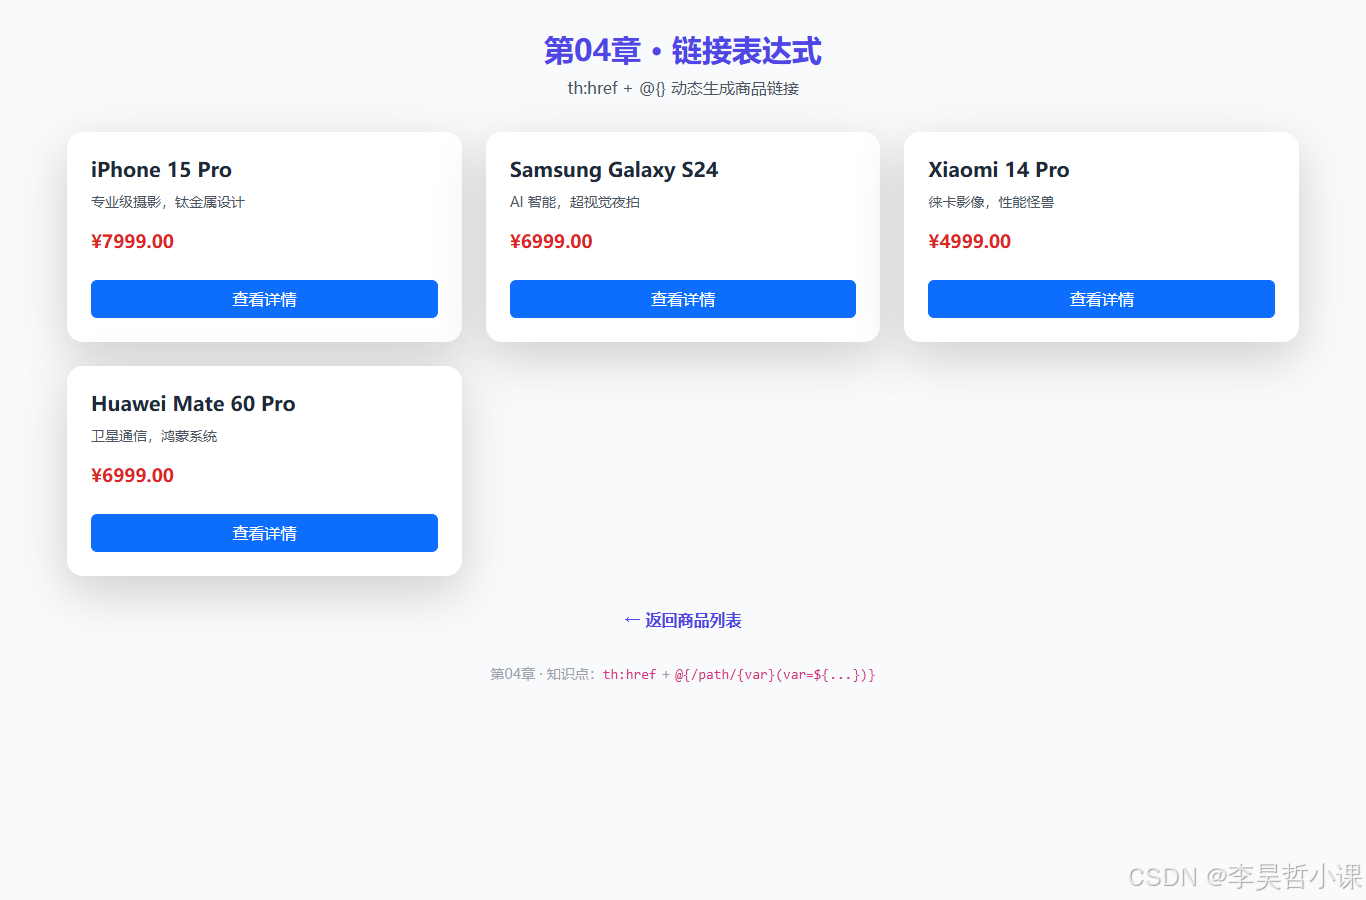
商品列表页面展示了链接表达式的动态生成:每个商品卡片的"查看详情"按钮通过 th:href="@{/product/{id}(id=${p.id})}" 生成指向对应详情页的动态链接。
商品详情页面
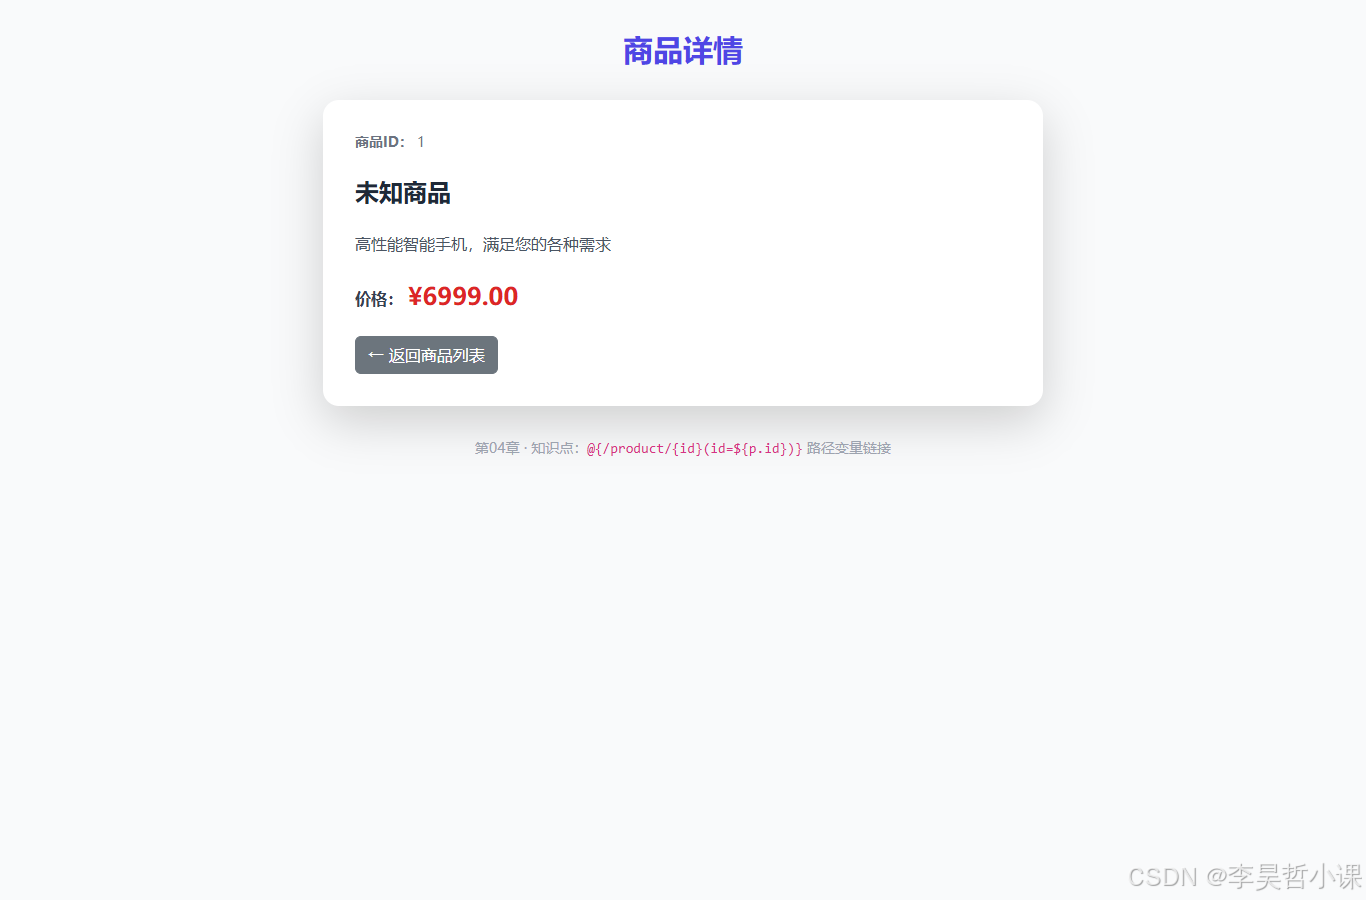
商品详情页面演示了路径变量链接的接收:通过 /product/3001 这样的 URL 访问,并显示"返回商品列表"链接(使用 @{/products} 生成相对路径)。
常见坑
坑 1:路径变量名不一致
问题:@{/product/{id}(id=${p.id})} 中 {id} 与 (id=${p.id}) 不匹配。
原因:路径占位符名(大括号中的)必须与参数赋值中的键名完全一致。
解决:确保两者名称相同:
<!-- ✓ 正确:路径占位符 {id} 与参数 (id=...) 一致 -->
@{/product/{id}(id=${p.id})}

<!-- ✗ 错误:路径占位符 {productId} 与参数 (id=...) 不一致 -->
@{/product/{productId}(id=${p.id})}
坑 2:忘记使用 th:href
问题:链接显示为 href="@{/products}" 原文,未解析。
原因:使用了标准 href 而非 th:href。
解决:改用 th:href:
<!-- ✓ 正确:Thymeleaf 会解析 @{} 表达式 -->
<a th:href="@{/products}">链接</a>

<!-- ✗ 错误:浏览器无法解析 @{} 语法 -->
<a href="@{/products}">链接</a>
坑 3:上下文路径处理
问题:应用部署在 /shop 上下文下,但链接指向 /products 而非 /shop/products。
原因:手动拼接 URL,未使用 @{} 自动上下文处理。
解决:始终使用 @{} 生成链接,Thymeleaf 会自动加上下文前缀:
<!-- ✓ 自动加上下文:/shop/products -->
<a th:href="@{/products}">链接</a>
坑 4:查询参数编码问题
问题:查询参数包含中文或特殊字符时,URL 未正确编码。
原因:手动拼接查询参数,未进行 URL 编码。
解决:使用 @{} 自动编码:
<!-- ✓ Thymeleaf 自动对 keyword 进行 URL 编码 -->
@{/search?keyword=${kw}}

<!-- ✗ 手动拼接可能导致编码错误 -->
/search?keyword= + ${kw}

电商企业物流数字化转型必备!快递鸟 API 接口,72 小时快速完成物流系统集成。全流程实战1V1指导,营造开放的API技术生态圈。
更多推荐


 15
15 0
0- 0


 已为社区贡献5条内容

所有评论(0)